


CREATE YOUR NECKLACE KIT
CREATE YOUR NECKLACE KIT
Couldn't load pickup availability
The delivery time for your pack will depend on the shipping method you have selected. Once you have shaped your piece and sent it back to us, our workshop will bring it to life and it will be ready in about 20-30 business days.
Instructions for use
 925 SterlingSilver
 Handmade
 Customisable product
 Adjustable
 Made in Europe
 Exchanges and returns
 3-year warranty
 Secure payment
 Sustainable packaging
 Gift packaging available
 Worldwide shipping
FEATURES
FEATURES
- Material: Sterling Silver 925
- Chain length: 38 cm with 7 cm extender
- Chain thickness: 0.5 mm
- Includes: the pack to create your necklace and, once made, the pendant and chain.


Size guide

The best way to find your ring size is to follow the steps in this guide. Choose the method that works best for you and you will know your exact size in just a couple of minutes.
Ring size guide
We offer two types of rings: adjustable rings and fixed-size rings. If yours has a fixed size, here are four different ways to find it so you can choose the method that feels easiest.
Almost all our rings are available in sizes 8 to 20, and some models are available up to size 24. Please note that thicker rings usually fit a little more snugly than thinner ones.
If you prefer not to depend on a specific size, we also offer adjustable rings. They adapt to different finger sizes, so you do not need to know your size in advance. Each model covers a different size range, which is listed in its product description.
We also offer midi rings and toe rings, designed to be worn on your toes, halfway up your finger or even as a regular ring, depending on your size. These models are available in size S (equivalent to size 4) and M (equivalent to size 6).
Bracelet size guide
To help you understand the measurements of our bracelets, we have created a guide that you can print and use directly on your wrist.
If you have any questions, contact us at info@sansarushop.com.
Here are four different ways to find your ring size. Choose whichever method feels most comfortable, but if you are between two sizes, always choose the larger one.
Option 1. Using your phone camera
Measure your finger with your phone in under two minutes, without a printer or another ring for reference.
- Open the product page of the ring you like and select “Find my size”, just below the size selector.
- If you are using a computer, scan the QR code with your phone camera. If you are already on your phone, select “Find my size” and continue there.
- Allow camera access and follow the on-screen instructions to measure the finger on which you will wear the ring.
- When you finish, you will see your size and can return to the ring page with that size already selected.
Bear in mind that sizing can vary from one finger to another and between your right and left hands. Always measure the exact finger on which you plan to wear the ring. A thicker ring will usually fit a little more snugly than a thin one.
Option 2. Finger sizer
- Print this size guide on an A4 page and make sure the print scale is set to 100%.
- To check that it printed correctly, measure the reference line with a ruler and make sure it is 10 cm long.
- Cut out the sizer along the solid outline marked with the scissors.
- Carefully cut along the central dotted line using a craft knife or scissors.
- Assemble the sizer by rolling it with the printed side facing outwards and threading it through the slit.
- Place the sizer around the finger you want to measure and gently pull the end until it no longer slides, without making it feel tight.
- The sizer will show your size. If it falls between two sizes, always choose the larger one.
Option 3. Ring sizer
- As with the previous option, print this page with your printer scale set to 100%.
- To check that the printed measurement is correct, measure the indicated scale with a ruler and make sure it is exactly 5 cm long.
- Take a ring that already fits you the way you would like your San Saru ring to fit and place it over the circles.
- The circle should fit neatly inside the ring, without the ring covering the line or leaving a gap. You have now found your size.
Option 4. Without a printer
- Take a ring that already fits you the way you would like your San Saru ring to fit, along with a ruler.
- Measure the ring’s inner diameter straight across the centre.
- Compare that measurement with the conversion table below.
Ring size conversion table
| ES Size (San Saru) | Diameter | US Size | FR/DE Size |
|---|---|---|---|
| 4 | 14.0 mm | 3 | 44 |
| 6 | 14.6 mm | 3 3/4 | 46 |
| 8 | 15.2 mm | 4 1/2 | 48 |
| 10 | 15.9 mm | 5 1/2 | 50 |
| 12 | 16.5 mm | 6 | 52 |
| 14 | 17.1 mm | 7 | 54 |
| 16 | 17.8 mm | 7 3/4 | 56 |
| 18 | 18.4 mm | 8 1/2 | 58 |
| 20 | 19.1 mm | 9 | 60 |
| 22 | 19.6 mm | 9 3/4 | 62 |
| 24 | 20.3 mm | 10 1/2 | 64 |
Already know the diameter? Calculate your size instantly
Sizes 22 and 24 have limited availability. If you are interested in either of these sizes, the following models are available:


Midi rings and toe rings are available in two sizes: S, equivalent to size 4, and M, equivalent to size 6.
If you are between two sizes, always choose the larger one. If you are still unsure after using this method, try the previous options.
To print the sizer at the exact scale, download the PDF guide and set the print scale to 100%.
Download sizer PDFIf you have any questions, contact us at info@sansarushop.com.
To understand the measurements of our bracelets, follow these steps using the printable guide below.
- Print this page with your printer scale set to 100%.
- Cut out the sizer shown at the side, following the solid outline marked with the scissors.
- To check that the printed measurement is correct, use a ruler to measure the sizer scale and make sure it is exactly 5 cm long.
- Carefully cut along the dotted line at the start of the ruler using a craft knife or scissors.
- Measure your wrist and compare the result in centimetres with the circumference shown for bangles or the length of the bracelet you would like to buy.
- You can find this information on each bracelet’s product page.
Example
Your wrist measures 16.4 cm. The bracelet you like measures 15.6 cm and has a 3 cm extender, making it 19.6 cm in total. It would fit you!
To print the ruler at the exact scale, download the PDF guide and set the print scale to 100%.
Download sizer PDFIf you have any questions, contact us at info@sansarushop.com.
More than 1 million customers


ASÍ FUNCIONA TU KIT
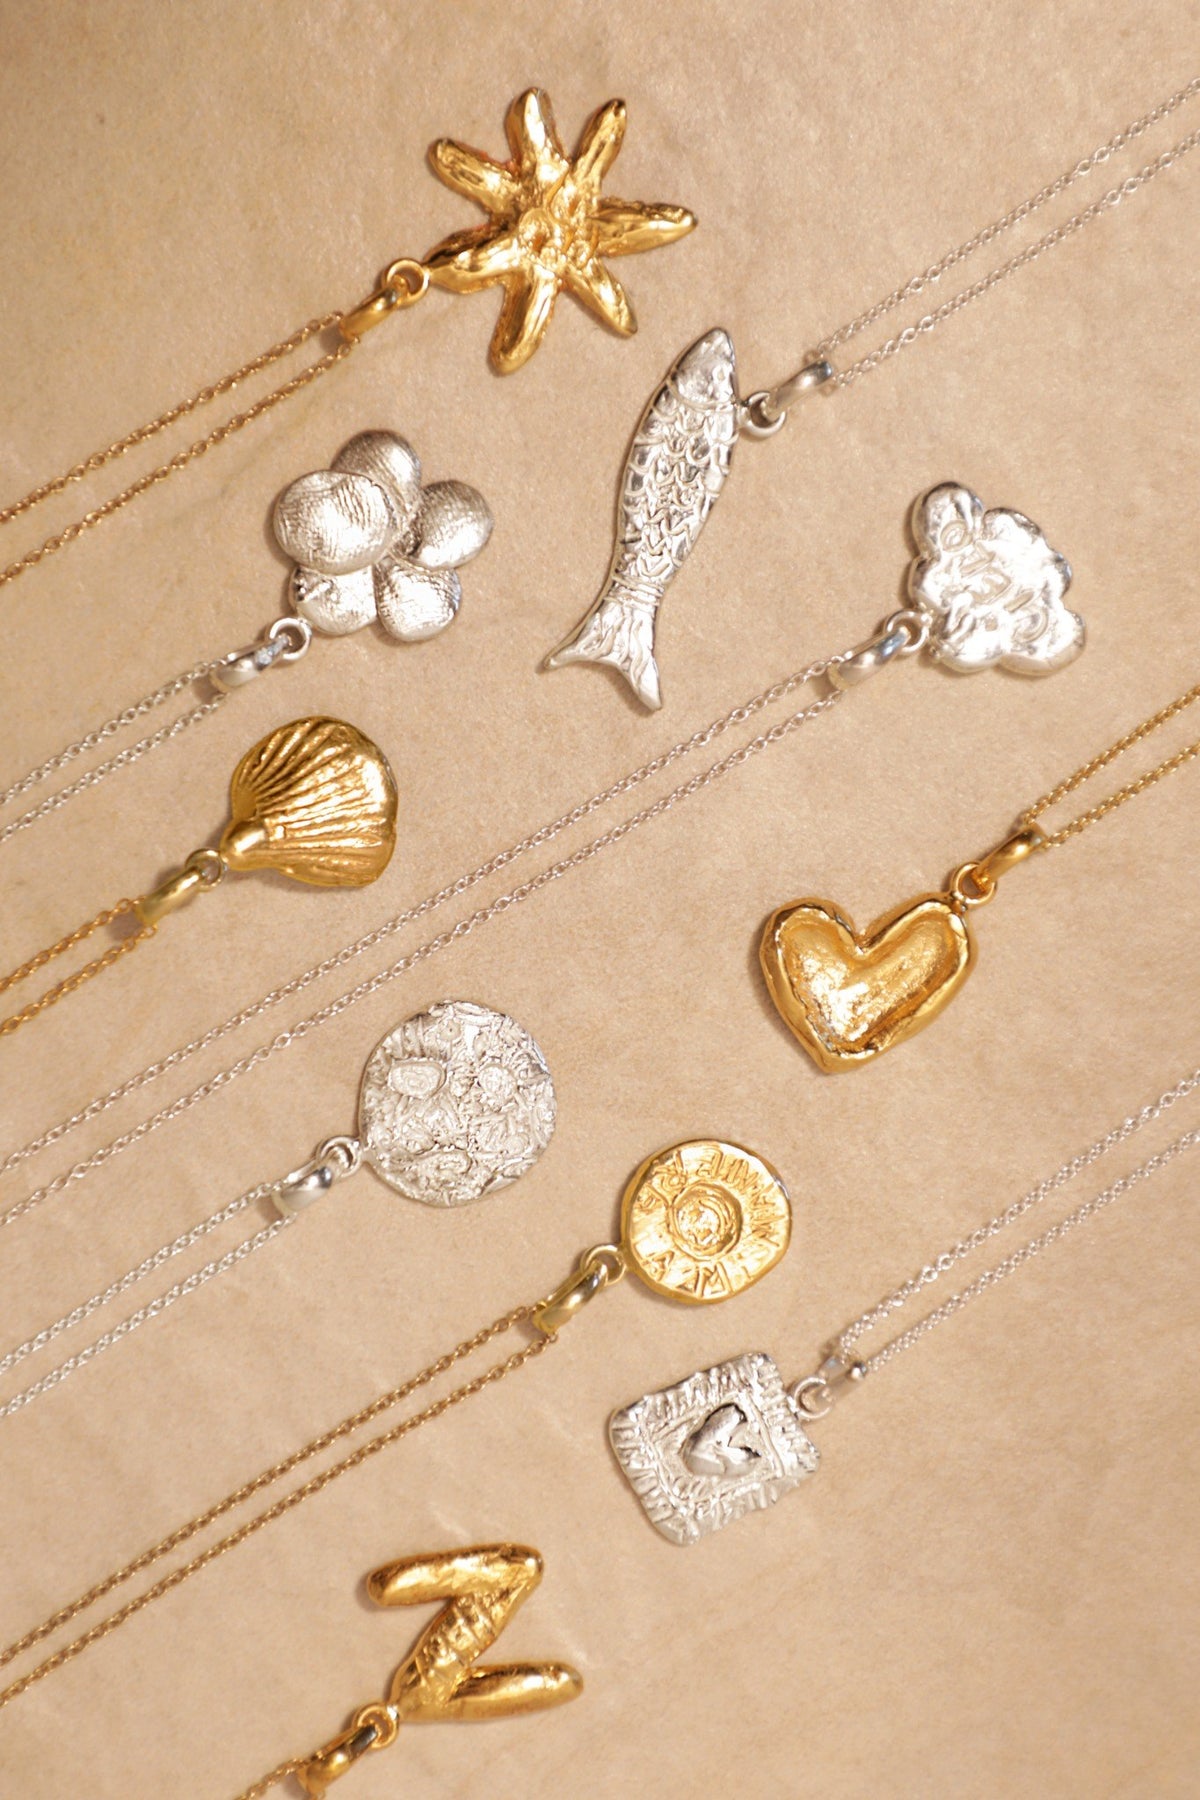
Tú das forma a la cera en casa. Nosotras la convertimos en tu joya.
- Kit en 3 - 4 días laborables
- Envío de vuelta incluido
- Tu joya en 20 - 30 días laborables

¿QUÉ RECIBIRÁS?
- Una caja con la cera roja
- Un marcador para indicarnos dónde va la argolla
- Una tarjeta con un QR para ver las instrucciones
¿CÓMO CREO MI JOYA?


Recibe tu pack
Elige tu joya en nuestra web y te enviamos todo lo necesario: la cera roja, el marcador y un QR con las instrucciones.
INSPIRACIÓN


ENVÍO DE TU CERA
Cuando tengas la cera definitiva, haz 2 fotos (una por cada cara) en una superficie lisa y con buena luz. Guárdala en la caja de San Saru, sin nada más que pueda golpearla.
Después, entra en nuestro portal de huellas con tu número de pedido y tu mail, código postal o teléfono de la compra:
- Sube las 2 fotos de la joya y pulsa “Subir mis fotos”.
- Pulsa “Enviar solicitud”. Si tienes varias joyas, sube primero las fotos de todas para que viajen juntas.
- Revisamos tus fotos y te enviamos la etiqueta de retorno por email. También la podrás encontrar en el portal.
- Lleva el paquete a tu punto más cercano de envío. Puedes pegar la etiqueta impresa o enseñar el código QR.
- Cuando recibamos la cera, nuestro taller creará tu joya en unos 20-30 días laborables. Todos los gastos de envío están incluidos, y te avisaremos por email con el seguimiento cuando salga hacia ti.
Si alguna foto no se ve bien, te escribiremos para que la repitas desde el portal. Y desde ahí puedes ver en todo momento cómo va el proceso de tu joya.
Pedidos de Canarias: la etiqueta ya viene en el paquete. Pégala y lleva el paquete a tu punto de Correos más cercano. No hace falta entrar en el portal.

PREGUNTAS FRECUENTES
¿Qué joya puedo crear con la cera?
Con la cera roja crearás un colgante para collar, elaborado en plata de ley 925 en nuestros talleres de Barcelona.
¿Cuánto tiempo lleva todo el proceso?
El pack llega en 3 -4 días laborables. Una vez recibimos tu cera, nuestro taller crea tu joya en unos 20-30 días laborables.
¿Puedo hacer un cambio o devolución?
Al tratarse de una joya única, creada especialmente para ti, las joyas personalizadas quedan fuera de cambios y devoluciones. Por eso te recomendamos leer todos los pasos antes de empezar y escribirnos si tienes cualquier duda.
¿Cómo se trabaja la cera?
La cera roja funciona como plastilina. Con el calor de tus manos se va ablandando poco a poco, sin necesidad de fuego ni de otra fuente de calor. Solo necesitas un poco de paciencia.
¿Puedo crear cualquier forma?
Sí, tienes total libertad creativa. Puedes hacer bolitas o formas distintas, siempre que el resultado final quede unido en una sola pieza. Utiliza solo la cera del pack, sin añadir otros elementos. Puedes usar herramientas para moldearla o darle textura, y retirar cera si prefieres una pieza más pequeña.
¿La joya será exactamente igual que mi cera?
Sí. La forma que le des será la de tu joya, y cualquier marca, textura o detalle que quede en la cera se verá también en el resultado final.
¿Y si quiero cambiar algo?
Puedes volver a moldear la cera y empezar de nuevo tantas veces como necesites, hasta conseguir la forma que te guste.
¿Cómo os envío la cera?
Deja enfriar la cera, hazle 2 fotos (una por cada cara) sobre una superficie lisa y con buena luz, y guárdala dentro de su caja para protegerla de golpes. Después, entra en nuestro portal de huellas con tu número de pedido y el email, código postal o teléfono de la compra, sube las fotos y pulsa “Enviar solicitud”. Revisamos tus fotos y te enviamos la etiqueta por email, que también encontrarás en el portal. Solo tienes que llevar el paquete a tu punto de envío más cercano, con la etiqueta impresa o enseñando el código QR.
¿Qué pasa si alguna foto necesita repetirse?
Te escribiremos para que la vuelvas a subir desde el portal. Desde ahí también puedes seguir en todo momento cómo avanza tu joya.
Mi pedido es de Canarias, ¿cómo lo envío?
La etiqueta ya viene en el paquete. Pégala y lleva el paquete a tu oficina de Correos más cercana, sin necesidad de entrar en el portal.


